Simple Way to Play Super Famicom Games on the SNES? Maybe.
Recently I’ve been looking for a more reliable way to play Super Famicom games on my NTSC Super Nintendo without modifying the console or my Game Genie. Sure, removing the tabs is fairly simple, but I feel there has to be a better way to get the job done without mutilating the console, or my Game Genie. I could use my Super 8, or buy a converter, but I think I may have hit on a fairly reasonable, and cheap method to get the job done.
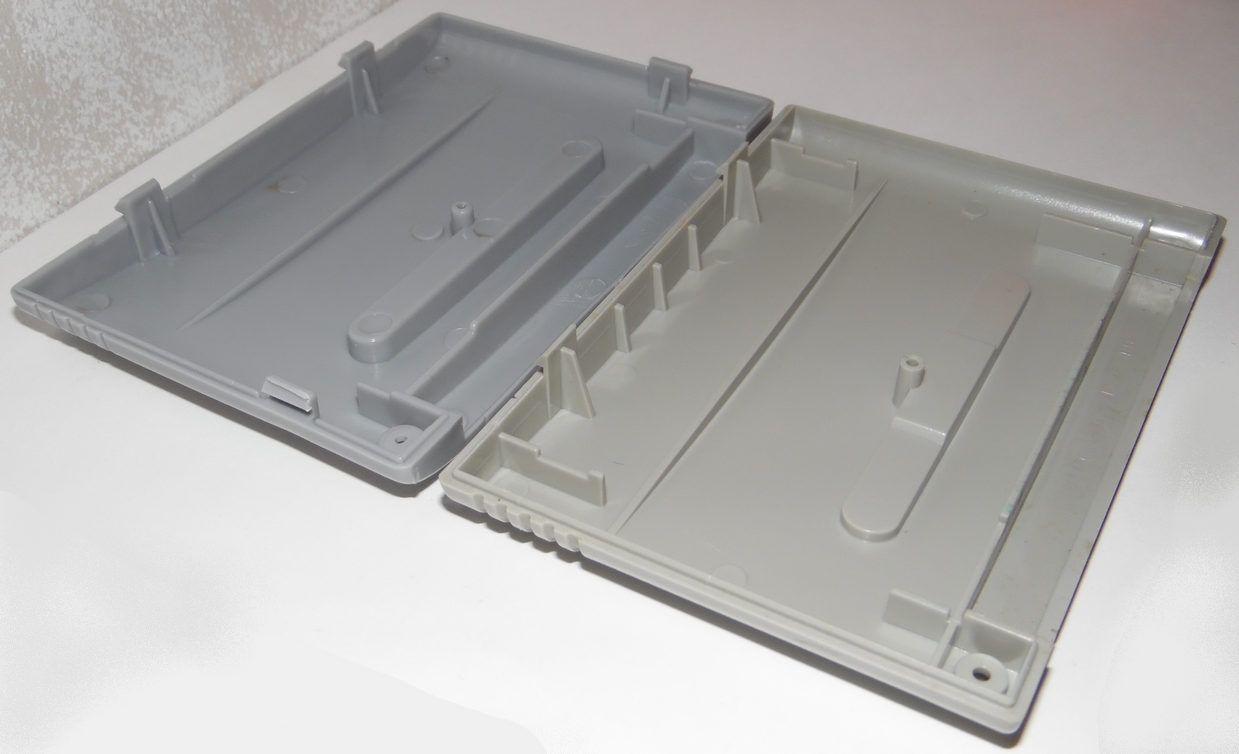
What I had been doing was swapping Super Famicom PCBs into an SNES cartridge and playing the game that way. This led me to search online for reproduction cartridges, so that I didn’t need to evict a game from its home, rather I would simply be rehousing the Super Famicom PCB into an empty cartridge. During this research I found Super Famicom shaped cartridges with proper cutouts on the back allowing it to fit into the NTSC Super Nintendo. Not only do these reproduction cartridges have the cutouts, they’re also snap together, making the swapping process much quicker and easier. Even though these cartridges are snap together they do have screw holes, if you would prefer a more permanent situation, but for myself I would rather be able to swap the game PCB out as often as I would need.

After almost a month of waiting the single cartridge I ordered finally arrived. As I stated previously my idea is to use the one cartridge multiple times and as my desired Super Famicom game changes, I will swap out the PCB from this and back to their original homes. I hope this is a viable option because the plastic feels slightly cheaper than the original cartridge, but as long as the reproduction is carefully pried open it seems this should suit my needs just fine. This reproduction cartridge fits into the Super Nintendo console, albeit a bit snug. And everything seems to work just fine. The overall casting of this is fairly nice, until you see the bottom, which is completely and totally messy, but it holds game PCBs just fine, with no wiggles or rattles.


I paid about $3 for this reproduction cartridge and waited almost a month for it to arrive and it seems to suit my needs just fine, for now. If you’re looking for a more permanent solution to replacing a cracked cartridge I would say these would be a good option. There is a spot for a label and everything, to make it look official. The one problem you might have is these are cast in a darker color than genuine Super Famicom cartridges, and they might not match the rest of your collection perfectly. The reproduction halves are not compatible with genuine cartridge halves either. Say you just want to replace the back of your beloved Super Famicom cartridge, this is not your salvation.


For my needs, which are simply swapping out PCBs from their original homes into a cartridge that holds them safely and allows them to be played in my NTSC Super Nintendo, I’m happy. Will the snap tabs on the inside of the cartridge hold up to all the use they may potentially see? That’s something only time can tell. Again, I am fully aware I could purchase a converter, use my Super 8 or even modify my console or Game Genie to get the same results, but for my needs a few bucks for this reproduction cartridge and a little time putting the PCB into it is all I need.
Famicom to NES Converters
The Japanese Famicom had a much larger gaming library than the NES did (approximately 20% bigger), but sadly a lot of good titles never made it to the NES library for one reason or another. If you don’t own a Famicom and want to play these games in your NES, you’ll need to hunt down a commercially available 60 to 72 pin converter and they can be expensive! I did some research online and I’ve found a more interesting solution to this issue, and I’m here to help you out through my experience!
A fact most people may not know is that some of the early NES games were no more than Famicom ROM boards with a converter, stuffed into an NES cartridge. I’m not sure why they did this, so I won’t bother to speculate. Among the list of potential converter carrying games is Gyromite, an extremely easy to find cartridge, but it doesn’t always yield a converter. I happen to own 3 copies of Gyromite, all of which showed supposed signs of having the converter inside, only 1 of which did. Here I will be explaining which games possibly have the converter, how to detect without a doubt whether or not your game will have one as well as what you need to do once you’ve found one.

Now, which one of these holds the converter?
Not all NES games have the converter inside. Most of the games that do are the early black labelled games released by Nintendo. These games were only released in this form for a short period of time, so these games can be pretty hard to find, but you may already have one in your collection. Here is a list I found online of games that potentially hold the converter:
Clu Clu Land
Donkey Kong Jr.
Duck Hunt
Elevator Action
Excitebike
Golf
Gumshoe
Gyromite
Hogan’s Alley
Mike Tyson’s Punch-Out!!
Pinball
Raid on Bungeling Bay
Rygar
Soccer
Stack Up
Tennis
Urban Champion
Wizards and Warriors
Wrecking Crew
Now, I’ve read many different methods on how to detect whether your game has a converter or not, but the truth is only 3 simple factors matter: A) It should be a game from the list above. B) The cartridge MUST have 5 screws. and C) The connection tabs on the board are off to the side instead of centered like most NES games. If your cartridge fits the required criteria, its a safe bet you can open it and find a shiny converter inside. There are normal NES games that don’t have the converter inside but do have the offset connection tabs, so if you’re looking through your collection to see if you may already have one, stick with the listed games above.

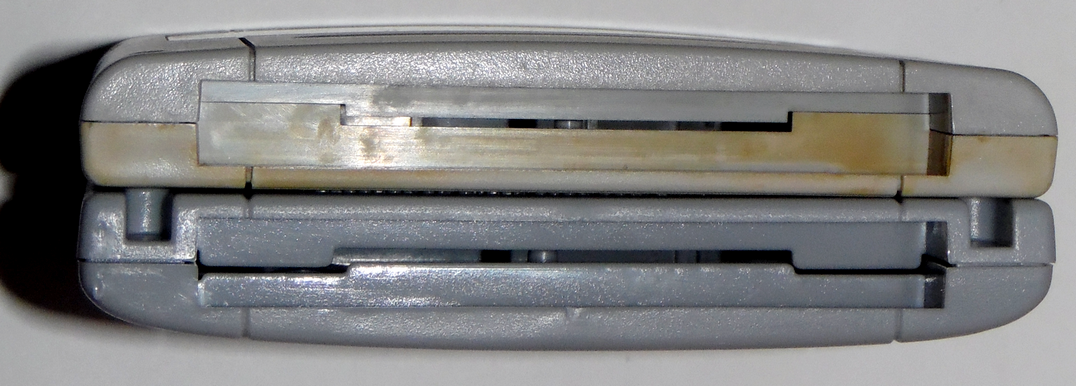
Left: Off center tabs = Converter
Right: Centered tabs = Standard NES board

There can be only one!
Once you’ve opened the game (which should only require a small flat head screw driver) and found the converter, you can’t use it just yet. First you have to take the ROM board out and flip the black part over so that the longest side is now facing upwards. Also you are going to need to shave down the sides to allow the Famicom games to fit on top of it, don’t shave too much just enough for the cartridge to be seated solidly into the converter.

So close!
Next you will need to make a case so that everything stays together and you can easily remove it from your NES, you can use it naked but removing it from an old box NES will be a problem, especially if you have a new 72 pin connector installed. Most people just cut the (now empty) cartridge straight across leaving just enough room at the top to exposed the connector. Case design is all up to your personal tastes, but remember the Famicom cartridge must have enough room to be seated securely and you will need something attached to remove the unit, such as a string or fabric strip.

All it needs now is a home!
Before putting everything together you may want to clean the contacts so that you don’t end up with glitchy graphics. Once you’re ready to put everything together, you will need something to hold the black connector in place as you will find it moves quite a bit in both inserting and removing the Famicom cartridges. I’ve seen people use hot glue and others use double sided tape, I had to use a combination of both as the gap between the converter and the side of the casing was bigger than I originally thought. Finally, take the two remaining screws and put the case together, now you can play Famicom games on your NES!

Not the best, but it was my first try.
Famicom cartridges must be installed with the front label facing down. If you look at the converter and the Famicom cartridge, the bevels will be on the same side, so you know you’ve installed it correctly. The great part about this converter project is that (pending you can find one) they’re fairly inexpensive as well as having an official NES10 chip to avoid your system trying to lockout the Famicom game. I’ve tested mine and everything works great, its a fun little project and the converter is a great piece of hardware for NES fans wanting to expand their game library to games that weren’t available for the NES, until now!

Game installed correctly!